 The purpose of RV weight distribution hitch is to ensure the towing vehicle of a level for a smoother ride that able to tow to the maximum weight capacity of the trailer hitch without the vehicle sagging or becoming difficult to handle. The best RV weight distribution hitch which has a weight and gross trailer weight rare simply clamps onto standard couplers with no fine tuning needed as the hitch head is pre-adjustment. Trailers weight is over fifty percent of the towing vehicles weight and that’s why the RV weight distribution hitch sway control is recommended when installed that instantly feel the improvement in turning, braking and trailer to oscillate. When buying RV weight distribution hitch is highly recommended to choose one with sway control to reduce the trailer’s sway that will make more relaxed whilst towing as when the trailer is swaying which can be scary and dangerous because there are two weight ratings that must understand before purchasing an RV weight distribution hitch.
The gross trailer and tongue weight are the basic gross weight of the trailers load where the weight of the trailer and cargo that is behind the rear axle of the towing vehicle, with regular towing of these system the best RV weight distribution hitch include sway control to simply clamp on to the standard coupler. A premium RV weight distribution hitch includes top of the range sway control system that compatible with most electric trailer brake controllers with pre-adjusted hitch head that will simply clamp on to most standard couplers. Suggested the RV weight distribution hitch have a plenty of development gone into the sway control and the chain-link adjustable torsion bars has an excellent design which makes a non-sway trailer existent. The benefit of the chains doesn’t need to removed when backing up with a desirable trait as it can be frustrating having to remove the chain compared against the alternative but it is definitely worth the best RV weight distribution hitch can buy with excellent sway control and weight ratings. Another premium of a RV weight distribution hitch that focus on heavy sway control uses a 4-point sway control system that provides the highest resistance to trailer in terms of the weight ratings of the RV weight distribution hitch has a choice. Some option includes hitch balls along with configuration of the weight rating with all use two solid steel bars mounted directly on the metal brackets for a sturdy setup compared to which is similar to the price bracket. Because it does lack the weight rating makes up with the impressive sway control on one the RV weight distribution hitch with sway impressive 4-point system being the main point and major feature system. Peoples majority will not able to stretch the budget to the price of the two alternatives use where comes in as it is the most cost effective alternative includes a distribution hitch that needed to install the system into the towing vehicle that match the requirements with different weights.
0 Comments
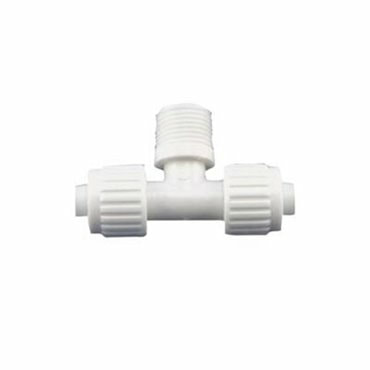 When it comes to maintaining the toilet in your RV, there are a few factors to consider. Firstly, an rv shower plumbing parts is a little more finicky than a home toilet, although the only real difference is that the sewer tank is attached to the RV, instead of going into a septic tank or sewer system. Regular maintenance of the toilet in your RV’s bathroom helps to prevent the build-up of odors, as well as blockages and overflows, which can be expensive problems to have. The shower of your RV can often be one of the biggest draws of owning an RV. After a long day of hiking, fishing, skiing, and other outdoor adventures, you aren’t crawling back into a tent (as fun as that is); you’re walking into a home away from home, including a hot shower. However, maintaining the shower in your RV is crucial to keeping your RV in working order for many years. We’ve written about the basics of replacing rv shower plumbing parts before here, but we want to cover some more parts of maintaining your shower.
Preventing buildup of anything will help keep your shower in perfect working order. Whether you have a basic shower head or a shower head with a wand, you need to keep an eye on those parts to check for anything that might cause a leak or nasty build up. Wiping fixtures after each shower goes a long way towards preventing buildup. You can also use a squeegee to push excess water towards the drain; this is specifically important for RV’s with a wet bath. A wet bath is where the shower, toilet, and, many times, the sink are in one large stall. Doing so not only prevents a buildup of mold and moisture but also helps prevent falls from rogue water later on. You might notice your shower head is leaking just a little bit, or that your shower pan is starting to get a small crack. You might be tempted to put off these replacements for later, thinking it won’t be that bad. We encourage you to never overlook rv shower plumbing parts. Leaking shower heads should be replaced immediately, as should any shower pans that are starting to develop cracks or other damage. We wrote a blog post about replacing these parts several years ago; click here to read it. After each camping trip, you should do a deep clean of your shower that includes using a cleanser and wiping everything down. Many RV owners swear by using dryer sheets to clean their shower because the fibers are enough to scrub off any build up, without damaging the surface. Before and after each trip in your RV, you should check the rv shower plumbing parts. The toilet seal helps keep water in your RV toilet at all times and keeps odors at bay. When the seal hardens or dries out, it can leak, causing odors. One easy way to fix this is to use something like plumber’s grease to seal any areas that are hardened or dried out. If the seal is starting to experience a lot of wear, it might be best to replace the toilet seal entirely; we like this tutorial to do so. 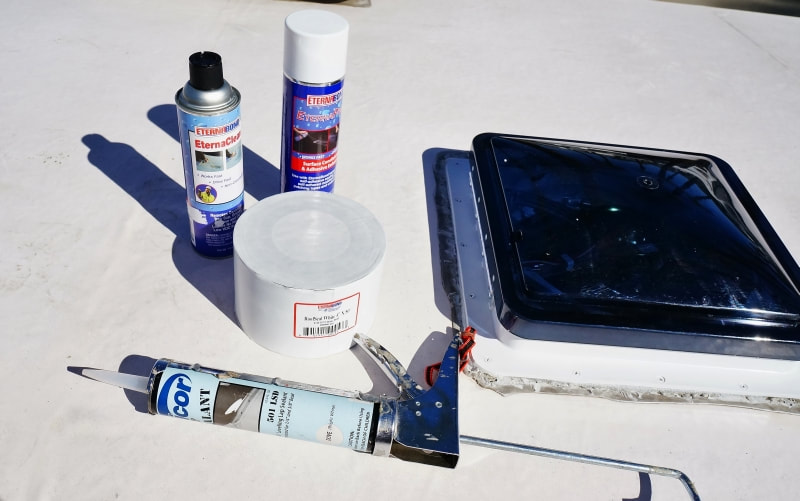 One of the best things about a well manufactured RV is that it doesn’t turn into a massive oven. This is because of the good ventilation system that allows air to come in and out of the vehicle so you and your passengers don’t roast in the summer heat like Thanksgiving turkeys. Your rv roof vent cover seal and air conditioner provides circulation to make your vacations more comfortable for all. Many RVs come with several of these useful vent lids, but they tend to fall into disrepair over time due to rain, overexposure or simple wear-and-tear. Even ultraviolet rays take a toll on the vents over time, making them liable to crumble at the slightest contact. Most RV owners recommend using a self-leveling sealer while installing a new roof vent. It is essential as this helps seal a new vent lid to the roof with greater strength. It prevents further rain water from seeping through.
Simply use a liberal amount of the paste during installation to be sure you have a tight seam between the vent exterior and your roof. This rv roof vent cover seal might prevent costly water damage, so don’t be discouraged by the price of a good sealer is designed for replacing or installing roof vents or side vents. It works with a variety of metal RV surfaces. In instance that you need to remove for any reason, just use a hair dryer on high to help melt the caulk and remove the lid. There’s a part of a possibility of it breaking with an RV vent lid, the lidded plastic dome that opens and closes above the vent to keep air from going out or allow it to come in. RV vent lid replacement is a simple task but for some of you who might struggle with the difficult instructions on your new vent lid or by simply obtaining the right tools, a list of helpful tips to keep your RV up to date and as unlike an oven as possible. The rv roof vent cover seal is intended to work with specific Vent Line Roof Vents and kit includes a roll of the gray putty tape that is 8 feet long and 1-inch-wide, and several attachment screws. If you're replacing an existing vent, though, the job will be significantly easier, and you may be able to tackle it yourself. Just make sure to take very accurate measurements and pay close attention to the way the original vent was installed. If you carefully follow the manufacturer's instructions for installing the new roof vent then you shouldn't encounter any unforeseen problems. Proper rv roof vent cover seal will ensure the roof vent with caulk so that it is water tight is often the biggest stumbling block to a successful installation that is why an extra care is important when completing this step. Spend an extra time to ensure that the roof vent is properly sealed will save you time, also save money and repair bills to fix water damage in the future. 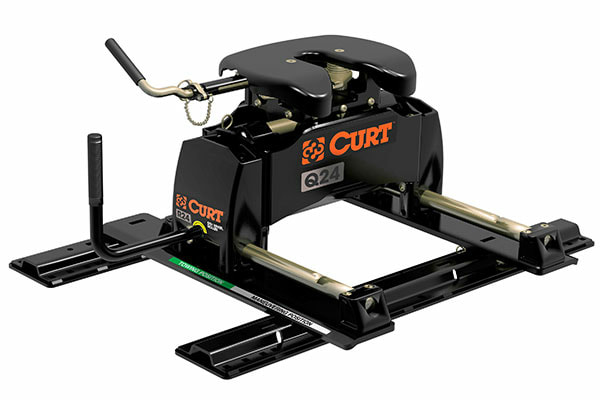 Most trailers and fifth wheels usually have their stabilizer jacks with them. Stabilizer jacks are just used for stability and many manufacturers of RV jacks labels their product that it is not used or intended for leveling. And as a responsible person, you’ll need to handle that leveling process before deploying the stabilizers. Hopefully, you’ll have the RV jacks’ instruction manual available to you if you don’t know what you are doing. If not, study first their general guidelines before doing it. Some RVs today are equipped with an advance feature called hydraulic leveling and these systems can save you some time when you pull up to the campground as your RV will electrically extend legs to the ground and level itself. As for the other typical RV owners who don’t have this feature, leveling is still a simple process when you have the right materials and the proper knowledge to do so. If your camper doesn’t come with a pre-installed self-leveling system, make sure to install a bubble level on the outside of your camper or RV on the right level ground.
There are many types of travel trailer and RV jacks. What you need will depend on the type, size and weight of your RV:
A common misconception among RV enthusiasts is using too large of blocks under their RV stabilizer jacks. Blocks are necessary if you are parked on soft ground, but large blocks can negate your RV stabilizer jacks' integrity. The jacks are designed to hold weight only after they are sufficiently extended. An unleveled RV can weaken the structure or possibly cause damage to the undercarriage or chassis. It’s very important for your appliances to be level, especially your refrigerator in order to not damage and operate it functionally as it needed to be. It can also cause your tires to wear out, the stress on your door hinges and window frames. Moving up to a better set-up, you could install a set of permanently mounted stabilizing jacks. RV scissor jacks bolt or weld to your RV’s frame. That way, you just go around to each corner and hand-crank each jack into place. A set of bubble levels mounted on the RV’s exterior walls will indicate when you’ve found level. It is important that you know exactly what you’re doing when operating a jack, stabilizer or leveling block. If not, it could cause damage to your RV, a broken jack and could even lead to accidents causing physical injury. Typically, during the leveling stage of setting up your RV, it is always good to have a helping hand or a company to help guide you onto the center of your blocks. At the end of the day, you just want to get the campground set up as quickly and safely as possible to enjoy your stay.  There are essential items that every RV camper should never go without, like batteries, water and sewage hoses, surge protectors, and many more. But then there are those RV accessories that some hardcore campers might not consider critical to a trip, but are absolute “must haves” for those of us who want to add a little more fun and comfort while out on the road. Do you have these on your list?
|
 RSS Feed
