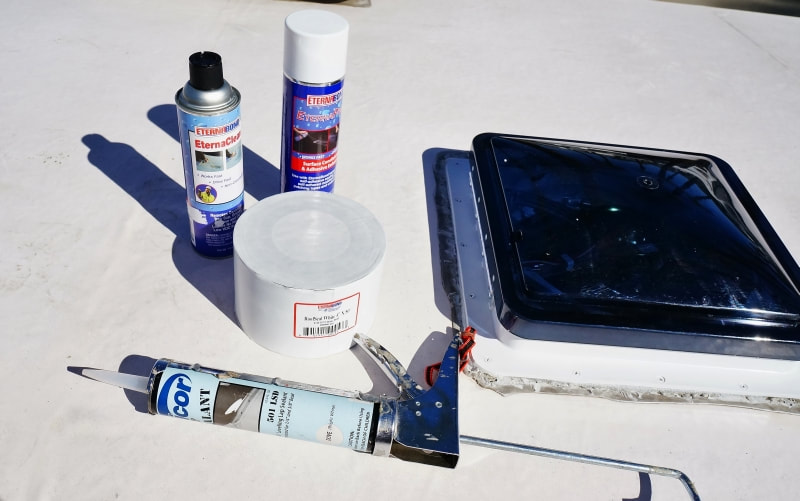
 One of the best things about a well manufactured RV is that it doesn’t turn into a massive oven. This is because of the good ventilation system that allows air to come in and out of the vehicle so you and your passengers don’t roast in the summer heat like Thanksgiving turkeys. Your rv roof vent cover seal and air conditioner provides circulation to make your vacations more comfortable for all. Many RVs come with several of these useful vent lids, but they tend to fall into disrepair over time due to rain, overexposure or simple wear-and-tear. Even ultraviolet rays take a toll on the vents over time, making them liable to crumble at the slightest contact. Most RV owners recommend using a self-leveling sealer while installing a new roof vent. It is essential as this helps seal a new vent lid to the roof with greater strength. It prevents further rain water from seeping through.
Simply use a liberal amount of the paste during installation to be sure you have a tight seam between the vent exterior and your roof. This rv roof vent cover seal might prevent costly water damage, so don’t be discouraged by the price of a good sealer is designed for replacing or installing roof vents or side vents. It works with a variety of metal RV surfaces. In instance that you need to remove for any reason, just use a hair dryer on high to help melt the caulk and remove the lid. There’s a part of a possibility of it breaking with an RV vent lid, the lidded plastic dome that opens and closes above the vent to keep air from going out or allow it to come in. RV vent lid replacement is a simple task but for some of you who might struggle with the difficult instructions on your new vent lid or by simply obtaining the right tools, a list of helpful tips to keep your RV up to date and as unlike an oven as possible. The rv roof vent cover seal is intended to work with specific Vent Line Roof Vents and kit includes a roll of the gray putty tape that is 8 feet long and 1-inch-wide, and several attachment screws. If you're replacing an existing vent, though, the job will be significantly easier, and you may be able to tackle it yourself. Just make sure to take very accurate measurements and pay close attention to the way the original vent was installed. If you carefully follow the manufacturer's instructions for installing the new roof vent then you shouldn't encounter any unforeseen problems. Proper rv roof vent cover seal will ensure the roof vent with caulk so that it is water tight is often the biggest stumbling block to a successful installation that is why an extra care is important when completing this step. Spend an extra time to ensure that the roof vent is properly sealed will save you time, also save money and repair bills to fix water damage in the future.
0 Comments
Leave a Reply. |
 RSS Feed
